
この記事では,プログラミング言語Rustのインストール方法と例題プログラムの実行を行います.
対象OSは,WindowsおよびLinuxです.両者のインストール方法について記載しています.
Rustインストール方法
ここでは,Windows向けのインストール方法およびLinux向けのインストール方法を記載します.
Windows
依存パッケージのインストール
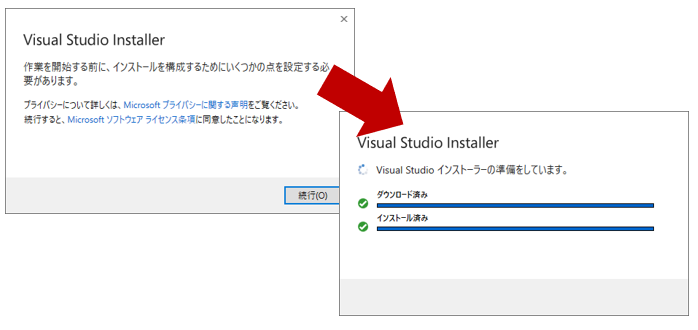
RustにはMicrosoft C++ Build Toolsが必要です.インストールしていない場合は,事前にインストールします.
Build Toolsがインストールされていない状態で,Rustインストーラーを起動すると次のような画面が表示されます.
Rust Visual C++ prerequisites

Rust requires a linker and Windows API libraries but they don't seem to be
available.

These components can be acquired through a Visual Studio installer.

1) Quick install via the Visual Studio Community installer
   (free for individuals, academic uses, and open source).

2) Manually install the prerequisites
   (for enterprise and advanced users).

3) Don't install the prerequisites
   (if you're targeting the GNU ABI).

>
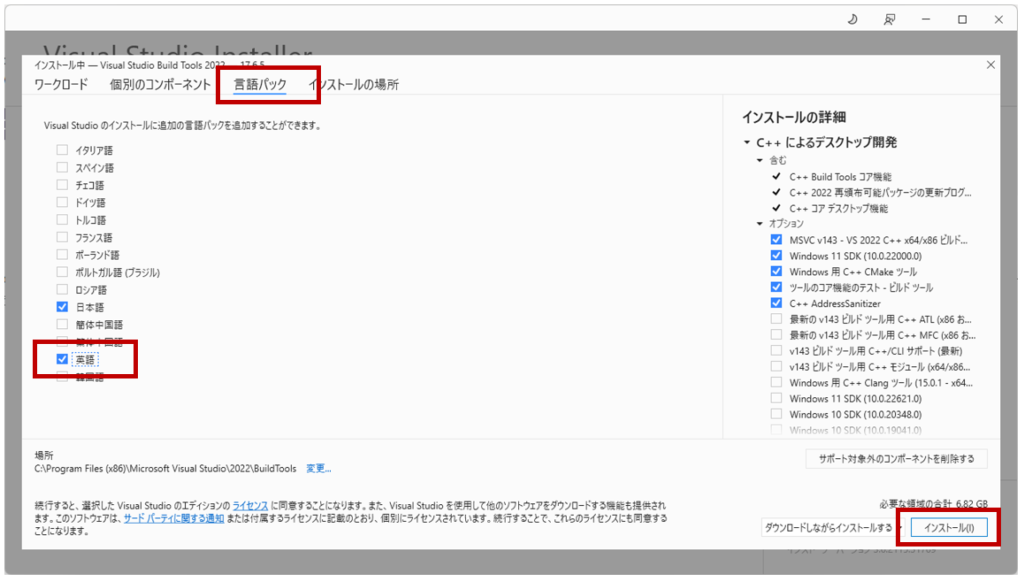
公式サイトにアクセスし,Build Toolsをダウンロードします.
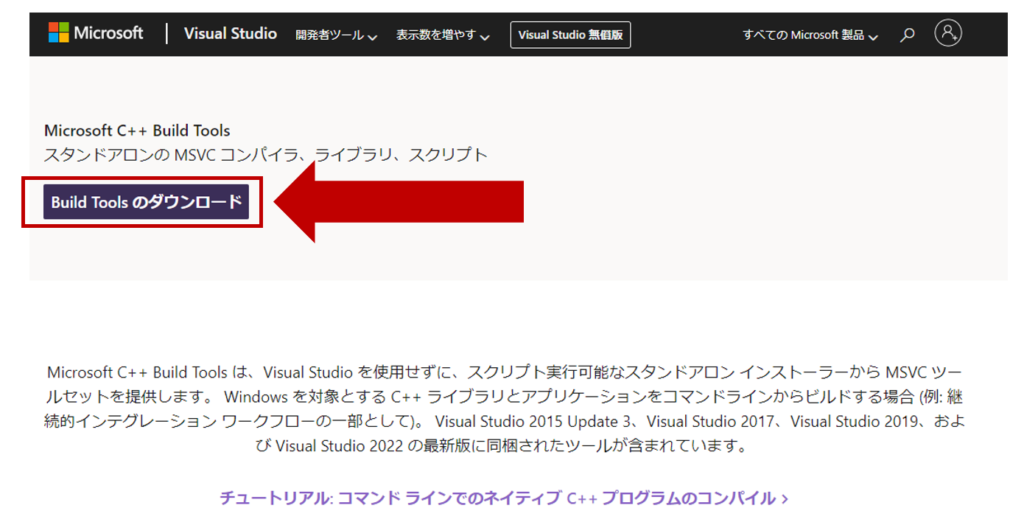
Build Toolsのインストールにおいて,「C++によるデスクトップ開発」と「言語パック:英語」をインストールします.

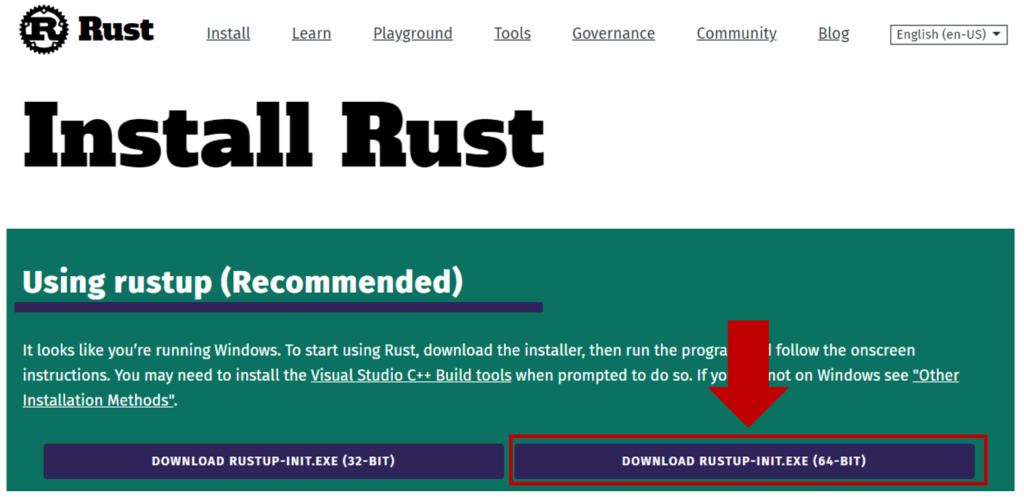
インストーラーのダウンロード
公式サイトにアクセスし,インストーラーをダウンロードします.基本的には64bitでOKです.
ダウンロードしたrustup-init.exeを起動し,Rustをインストールします.
...
...
...
You can uninstall at any time with rustup self uninstall and
these changes will be reverted.

Current installation options:


   default host triple: x86_64-unknown-linux-gnu
     default toolchain: stable (default)
               profile: default
  modify PATH variable: yes

1) Proceed with installation (default)
2) Customize installation
3) Cancel installation
>1
...
...
...
info: installing component 'rust-docs'
 13.6 MiB /  13.6 MiB (100 %)   3.4 MiB/s in  4s ETA:  0s
info: installing component 'rust-std'
 26.1 MiB /  26.1 MiB (100 %)   9.8 MiB/s in  2s ETA:  0s
info: installing component 'rustc'
 63.5 MiB /  63.5 MiB (100 %)  12.2 MiB/s in  5s ETA:  0s
info: installing component 'rustfmt'
info: default toolchain set to 'stable-x86_64-unknown-linux-gnu'

  stable-x86_64-pc-windows-msvc installed - rustc 1.71.1 (eb26296b5 2023-08-03)


Rust is installed now. Great!

To get started you may need to restart your current shell.
This would reload its PATH environment variable to include
Cargo's bin directory (%USERPROFILE%\.cargo\bin).

Press the Enter key to continue.
自動的に環境変数にRust関連は設定済みです.
Powershellを開いて,Rustのコマンドが使用可能であるかを確認します.
・Rustコンパイラ
rustc --version
rustc 1.71.1 (eb26296b5 2023-08-03)
・Rustパッケージマネージャ
cargo --version
cargo 1.71.1 (7f1d04c00 2023-07-29)
Linux
依存パッケージのインストール
GCCが必要です.あらかじめインストールする必要があります.
・Debian系
apt install gcc
・RHEL系
dnf install gcc
Rustのインストール
Rustは,管理者権限は不要で,ユーザ権限でインストール可能です.
curl --proto '=https' --tlsv1.2 -sSf https://sh.rustup.rs | sh
...
...
...
You can uninstall at any time with rustup self uninstall and
these changes will be reverted.

Current installation options:


   default host triple: x86_64-unknown-linux-gnu
     default toolchain: stable (default)
               profile: default
  modify PATH variable: yes

1) Proceed with installation (default)
2) Customize installation
3) Cancel installation
>1
...
...
...
info: installing component 'rust-docs'
 13.6 MiB /  13.6 MiB (100 %)   3.4 MiB/s in  4s ETA:  0s
info: installing component 'rust-std'
 26.1 MiB /  26.1 MiB (100 %)   9.8 MiB/s in  2s ETA:  0s
info: installing component 'rustc'
 63.5 MiB /  63.5 MiB (100 %)  12.2 MiB/s in  5s ETA:  0s
info: installing component 'rustfmt'
info: default toolchain set to 'stable-x86_64-unknown-linux-gnu'

  stable-x86_64-unknown-linux-gnu installed - rustc 1.71.1 (eb26296b5 2023-08-03)


Rust is installed now. Great!

To get started you may need to restart your current shell.
This would reload your PATH environment variable to include
Cargo's bin directory ($HOME/.cargo/bin).

To configure your current shell, run:
source "$HOME/.cargo/env"
インストール後は,下記コマンドで環境をロードするかターミナルを再起動します.(ターミナルを再起動することで自動的に環境がロードされます)
source "$HOME/.cargo/env"
Rust関連のコマンドが実行可能であるか検証します.
・Rustコンパイラ
rustc --version
rustc 1.71.1 (eb26296b5 2023-08-03)
・Rustパッケージマネージャ
cargo --version
cargo 1.71.1 (7f1d04c00 2023-07-29)
例題
① Hello worldを出力するプログラム
プロジェクト作成
まずは,hello_worldという名前のプロジェクトを作成します.
cargo new hello_world
プロジェクト作成直後は下記のようなディレクトリ構造となっています.
./
└── hello_world/
    ├── Cargo.toml
    └── src/
        └── main.rs
main.rsがソースコードで,Cargo.tomlが設定ファイルです.
main.rsは次のようにHello Worldをコンソールに出力するプログラムが書かれています.
main.rs
fn main() {
    println!("Hello, world!");
}
ビルド
cargo build
   Compiling hello_world v0.1.0 (/path/to/hello_world)
    Finished dev [unoptimized + debuginfo] target(s) in 0.28s
./
├── Cargo.lock
├── Cargo.toml
├── src/
│   └── main.rs
└── target/
    ├── CACHEDIR.TAG
    └── debug/
        ├── build/
        ├── deps/
        ├── examples/
        ├── hello_world*
        ├── hello_world.d
        └── incremental/
リリースモードでビルドすると,releaseのディレクトリが作成されます.
./
├── Cargo.lock
├── Cargo.toml
├── src/
│   └── main.rs
└── target/
    ├── CACHEDIR.TAG
    ├── debug/
    │   ├── build/
    │   ├── deps/
    │   ├── examples/
    │   ├── hello_world*
    │   ├── hello_world.d
    │   └── incremental/
    └── release/
        ├── build/
        ├── deps/
        ├── examples/
        ├── hello_world*
        ├── hello_world.d
        └── incremental/
実行
cargo run
    Finished dev [unoptimized + debuginfo] target(s) in 0.00s
     Running `target/debug/hello_world`
Hello, world
cargo run
    Finished dev [unoptimized + debuginfo] target(s) in 0.00s
     Running `target/debug/hello_world`
Hello, world
② フィボナッチ数列の計算
次はフィボナッチ数列の計算プログラムを作成します.
フィボナッチ数列とは
説明するまでもありませんが,フィボナッチ数列とは次のような数列を示します.
0, 1, 1, 2, 3, 5, 8, 13, …
漸化式にすると
$$F_0=0$$
$$F_1=1$$
$$F_{n+2}=F_n+F_{n+1}$$
です.
プログラムを作成
まずはプロジェクトを作成します.
cargo new fibonacci
まず,フィボナッチ数を返す関数を記述したファイルfibonacci.rsを作成します.
fibonacci.rs
pub fn fibonacci(n: u64) -> u64 {
    match n {
        0 => 0,
        1 => 1,
        _ => fibonacci(n - 1) + fibonacci(n - 2),
    }
}
main.rsではfibonacci.rsをインポートして,フィボナッチ関数を呼び出します.
main.rs
mod fibonacci;

fn main() {
    for i in 0..=10 {
        println!("F({}) = {}", i, fibonacci::fibonacci(i));
    }
}
ビルドし,実行します.
cargo build
cargo run
F(0) = 0
F(1) = 1
F(2) = 1
F(3) = 2
F(4) = 3
F(5) = 5
F(6) = 8
F(7) = 13
F(8) = 21
F(9) = 34
F(10) = 55

まとめ
この記事では,Rustのインストール方法を示しました.
RustはC++などと比較するとクロスプラットフォーム指向が強いため,Windows,Linuxにおいてもインストール方法が似通っており,非常に簡単にインストールすることができました.